Would you like to have a personalized DVD menu while making a DVD disc? You don't need to find a DVD menu editor separately, Leawo DVD Creator for Mac will be your good helper, which has combined DVD Creator and DVD menu editor in one program, which means you can edit DVD menu in your desire when you making a DVD disc. Below is a detailed guide on how to customoize DVD menu with Leawo DVD Creator.
Get Leawo DVD Creator for Mac Coupon Code
Get more Leawo Coupon Codes
Step1. Load videos to DVD Creator for Mac
Launch Leawo DVD Creator for Mac and click “add” or directly drag the videos to the program. You can add single video one by one or add a video file folder at a time to the program.
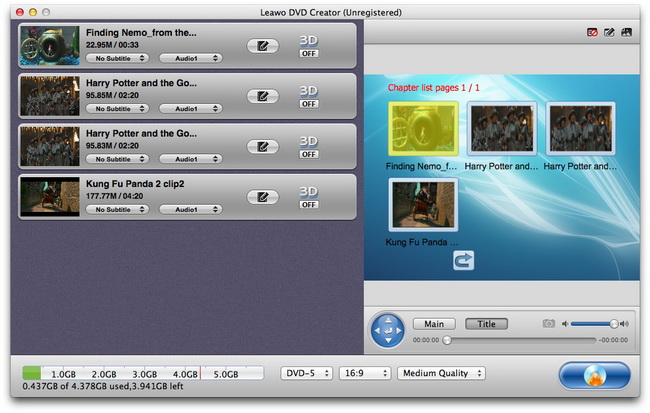
Step2. Choose DVD menu
Click on the "Menu Templates" button at top right corner, and in the existed panel there are many DVD menu themes for your options: Standard, Business, Education, Holiday, Nature, Others, Customized. Select one DVD menu template under any of the DVD themes and you will get real-time DVD menu template preview. You can either click on the "Disable Menu" button to remove the current menu and create DVD without menu templates.
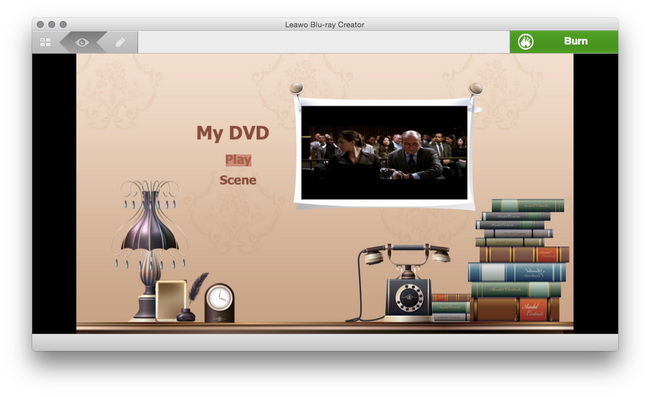
Step3. Customize DVD Menu
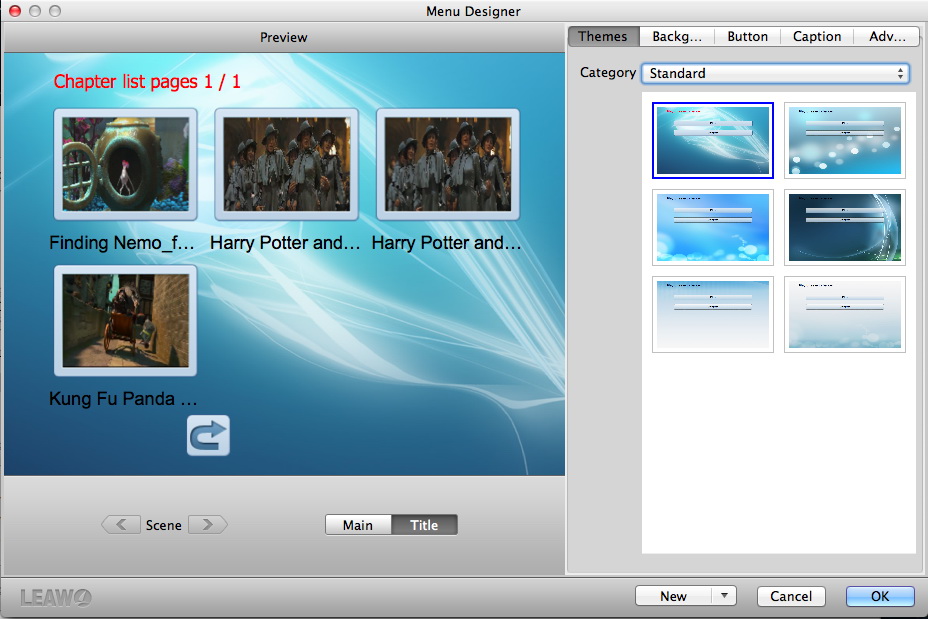
Click on the "Design Menu" button on the top-right part and you can switch to the following interface. Here you can carry out customizations as below:
1. In "Themes" section, you can choose one of the DVD menu template themes (Standard, Business, Education, Holiday, Nature, Others, Customized) accords with your aspirations.
2. In "Background" section, there are four ways prepared for you to choose DVD background: Gallery, Color, Picture and Video.
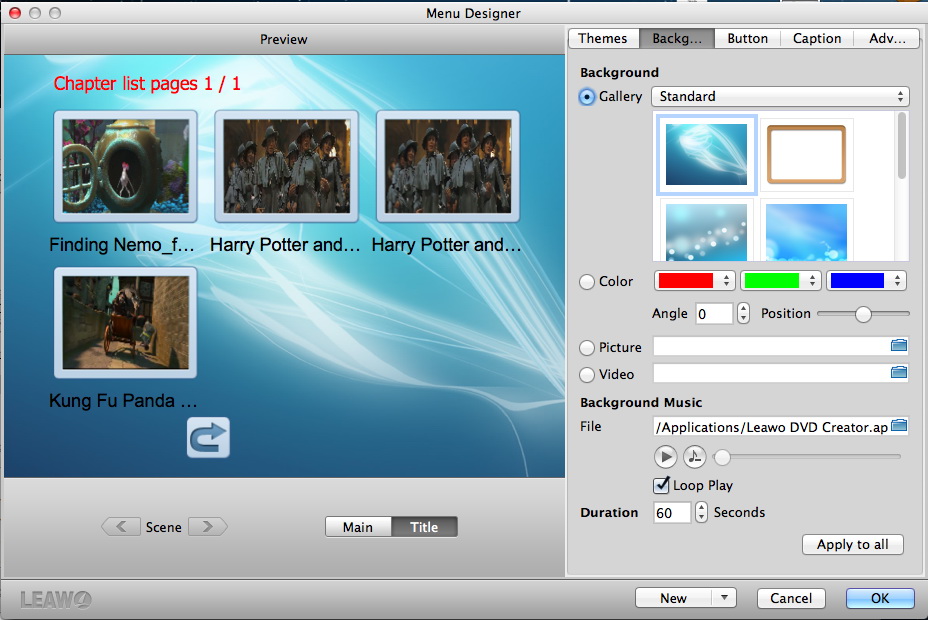
- Under Gallery, choose one from Standard, Business, Education, Holiday, Nature and Others to set as background.
- Under Color, choose three colors that and the tree colors will be mixed to set as background. Background Angle and Position are also provided for alteration.
- Under Picture and Video, image and video files can be served as background by importing the files from your local computer.
-
You are capable of inserting an audio file to be the Background Music from your PC. In "Duration", choose an exact value for how long you want the music last. Loop Play can be checked to meet up with the duration you just set.
3. In "Button" section, the Frame Style and Icon Style are available for your choice according to your need. Just select a Category and choose a Frame Style. Choose a proper Navigation and Return button from Icon Style.

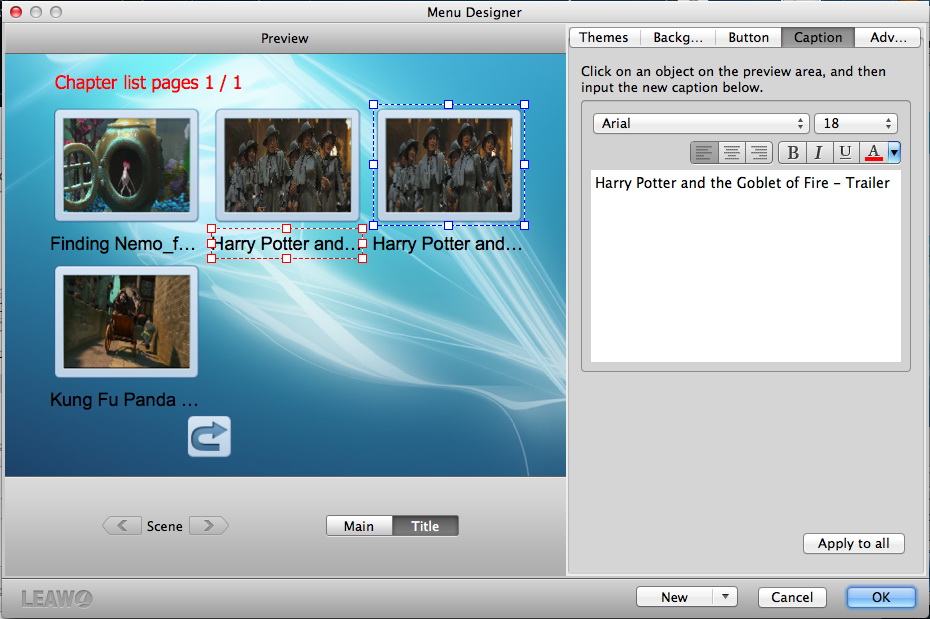
4. In "Caption" section, if you want to replace the old caption, just click on an object on the preview area and then input the new caption. You can select language, font, alignment etc to do more detailed modification.
5. In "Advanced" section, you can choose to show file name on menu or not, decide number of chapters displayed on each submenu. In addition, you are able to set the style of the focused menu item from Frame or Mark and then select the corresponding color or shape to do some settings.

Step4. Settings
Go back to the main interface. Click on the "Burn to DVD" button in the main interface to turn to the "Burning Settings" panel where you are with the ability to Burn To Disc/ISO File/DVD Folder, input your own Volume Label, Save To a destination on Mac, choose TV Standard based on your location and select output DVD Size you need.

Step5. Start making DVD
After all have been set, click on "Burn Now" button to start to burn video to DVD (DVD-5/DVD-9) or ISO image.
