Want to find some software that can help you write a video file onto a disc and create a DVD menu when put the disc into DVD player for playback? Then you deserve to have Leawo DVD Creator, which is a professional DVD creating program that enbale users to burn various videos to DVD while choose and edit preferred DVD menu from provided. To make your DVD menu editing much easier, the following post will show you how to edit DVD menu with Leawo DVD Creator step by step.
Get Leawo DVD Creator Coupon Code
Get more Leawo Coupon Codes
Step1. Import video files
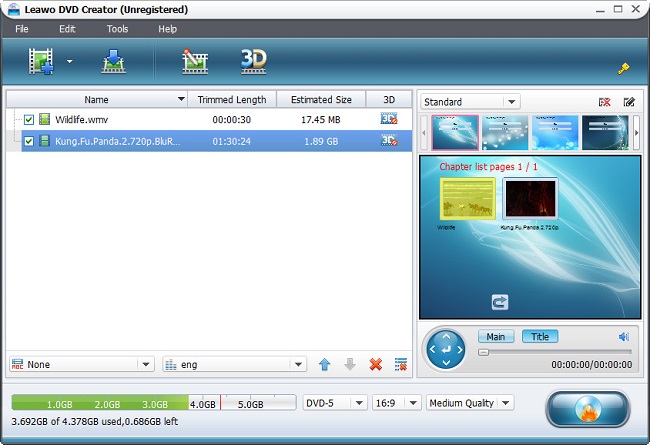
Launch Leawo DVD Creator and click "Add" button to import videos that you want to burn to DVD or just drag and drop source videos directly into the video to DVD burner for burning.You can adjust the order of imported video files, select subtitles and audio tracks to save in output, or even load external subtitles, preview source videos, select several files or all files to merge into one, etc. Output disc settings are available, including disc type (DVD-9/DVD-5), aspect ratio, quality, etc.
Step2. Choose and edit DVD menu
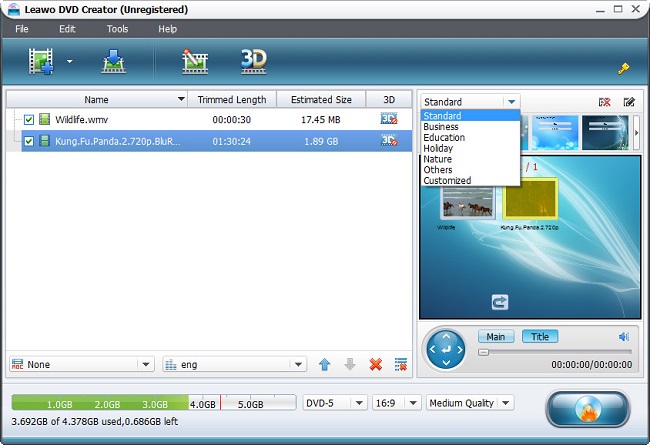
40+ free DVD menu and template models in 6 different themes (Standard, Business, Education, Holiday, Nature, Others) are preset in this DVD Creator for you to choose from. You can also preview disc menu and template with the built-in player. In case you do not want your output file with the built-in menu and templates, just click on "Disable Menu" button to remove disc disable menu and template.
Edit DVD Menu
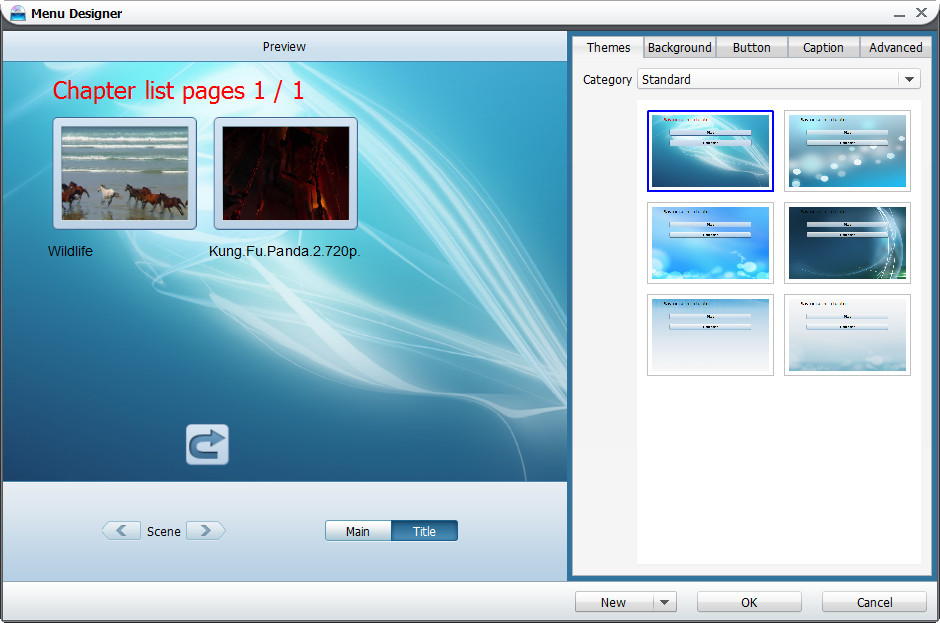
If you are not satisfied with the menu and templates embedded, "Design Menu” on the top-right corner of the right preview panel will allow you to customize DVD menu and template in an easy way. You are capable of entering the following five panels for menu customizations by taking advantage of "Design Menu" icon.
1. Themes
Choose a preferred DVD menu from provided template themes: Standard, Business, Education, Holiday, Nature, Others, Customized.
2. Background
Gallery, Color, Picture and Video are all available for you to set as disc background.
- In Gallery, opt for one from Standard, Business, Education, Holiday, Nature and Others to set as background.
- In Color, there are three frames for you to select three colors and the mixture of the three will be set as background. You can also adjust the background Angle and Position at your own will.
- In Picture, you are allowed to choose your loved image file from local computer to serve as background image.
- In Video, you can also import a video file as background to enhance your templates design.
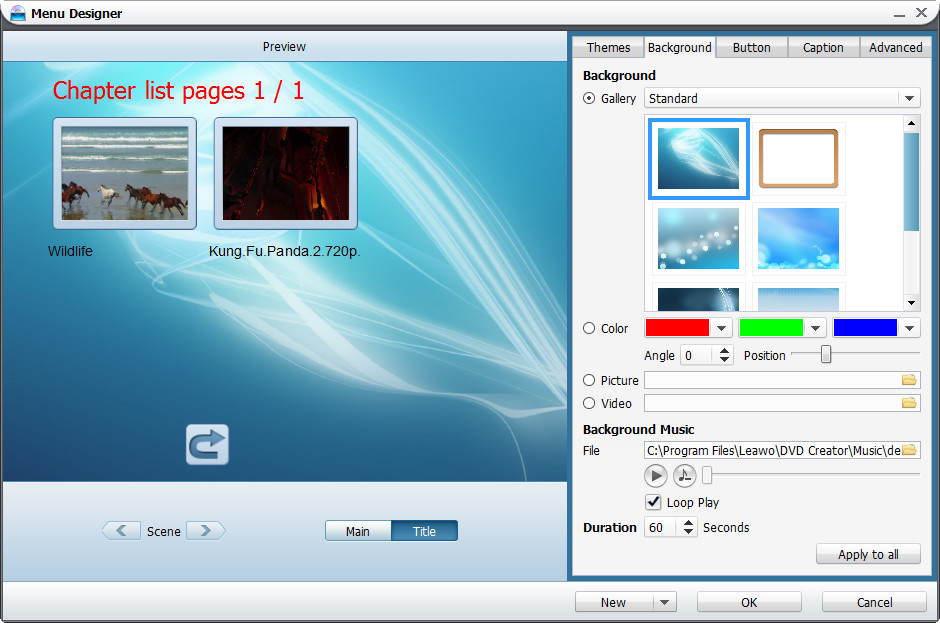
In order to better the menu authoring, you can also insert an audio file as the Background Music to make the template more phonic. In “Duration” section, you can set a specific value regarding on how long you want the music last. If the original music file duration is less than the needed duration, you can check "Loop Play" to make compensation.
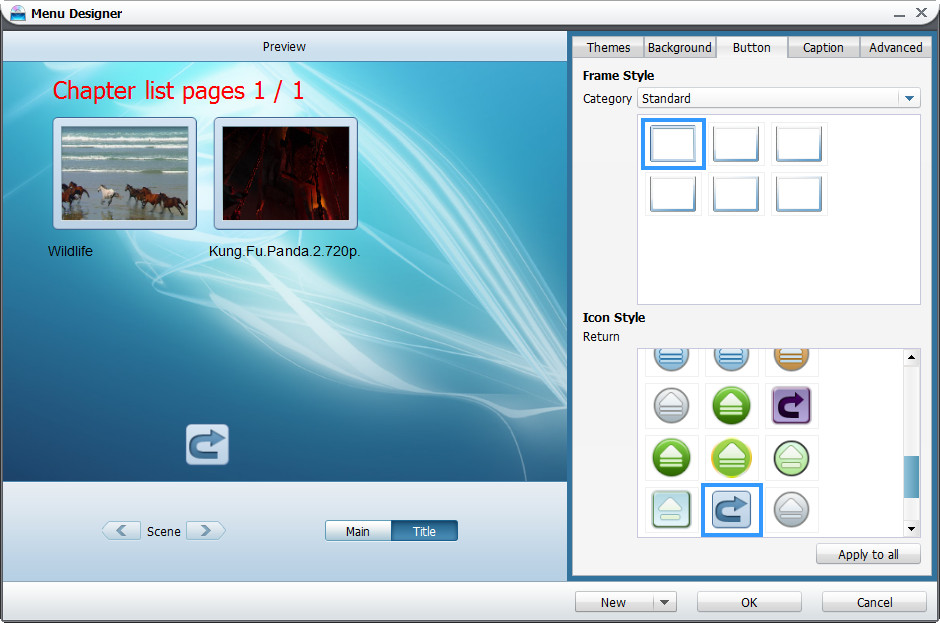
3. Button
Select any of the frame style button and icon style button from Standard, Business, Education, Holiday, Nature, Others, and Misc.
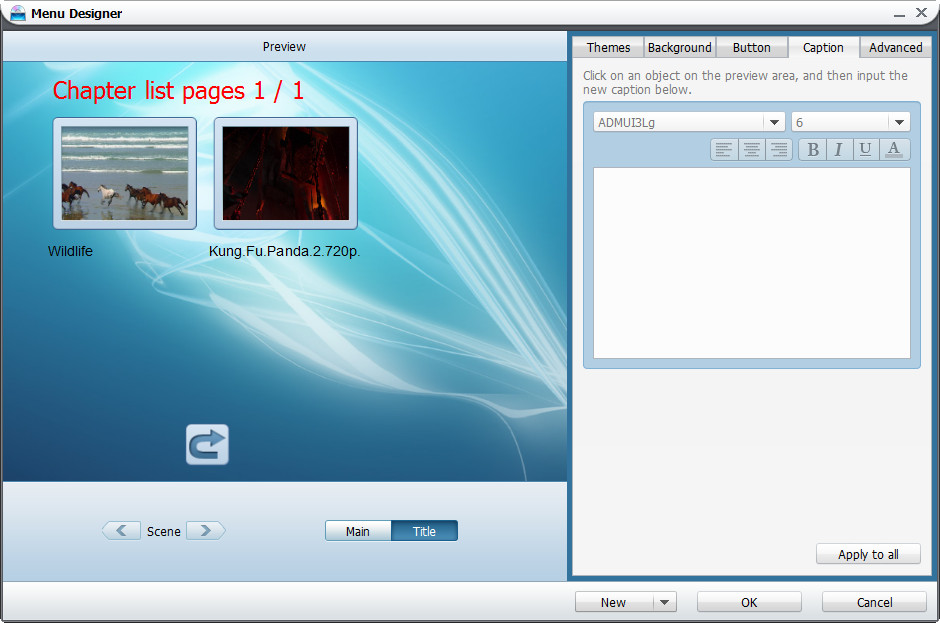
4. Caption:
Click on an object on the preview area and then input the new caption. Font style, front size, bold, italic, alignment, underline, front color etc. are all presented there for your modification.
5. Advanced:
In this part, you are enabled to regulate menu properties and style of the focused menu item, it is totally up to your choose to decide whether to display the file name or not on menu, display how many numbers of chapters on each menu. In addition, the style of the focused menu item also allowed being set, actually there are two kinds of Virtual key button type (Frame or Mark) for your option, choose one of them and then select the corresponding color or icon for them respectively.

Step3. Advanced Settings
Click on the huge "Burn to DVD" tab to enter the "Burning Setting" panel, where you can set the specific details regarding burning stuffs, including: burn video to DVD disc, ISO File or DVD Folder, choose to input your own volume label, choose the destination for you to save the output file, and select the suitable TV Standard and video size.
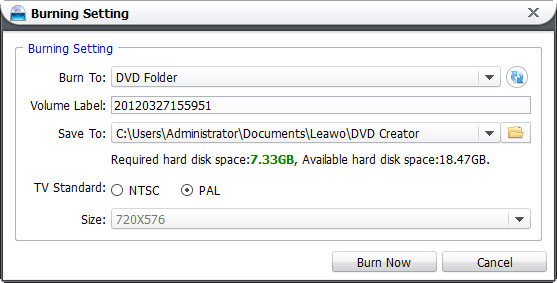
Step4. Burn Video to DVD
Click on the "Burn Now" button on the "Burning Setting" interface to begin video to DVD burning.
